HOW DO I ORGANISE MY CONTENT ASSETS

Folder Structure

From Director V3 onwards, you can set up a folder structure for all your content, including images, videos, signs, sequences, schedules etc.

If you have migrated from Director V2 to V3 there will be two folders by default – an ‘Assets’ folder that contains all your images and videos, and a ‘Signage’ folder containing all your signs, sequences, campaigns etc.

Otherwise, if you have a new V3 account, there will just be one folder, called ‘SignStix’, which contains everything used by the SignStix sample sign.

You are free to rearrange your folder structure to suit your business.

As an example, one approach would be to have:

  • A ‘Common’ folder for general-purpose images that might be used across lots of signs e.g. logos, brand assets, common backgrounds.
  • A folder for each marketing campaign e.g. ’2018-SpringLaunch’.
How do I organise my content assets

Add a folder as follows:

  1. Navigate to Content and from there to the existing folder (if any) where you would like the new folder to live.
  2. Click the plus (+) button near the top and choose ‘New Folder’.
  3. In the resulting window, enter a name for the folder.
  4. Click ‘Add Folder’ to complete the process.

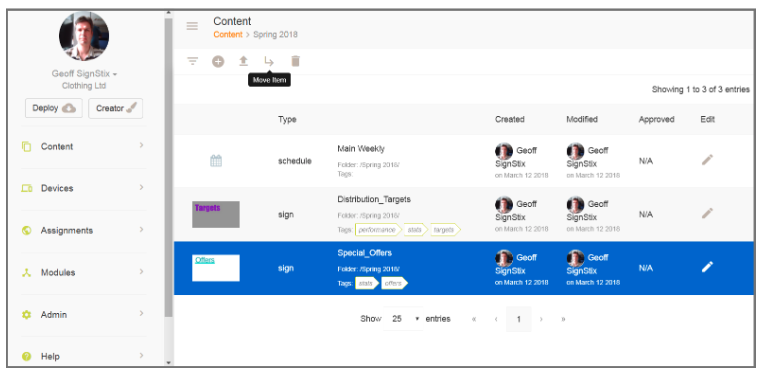
Move a file into a folder as follows:

  1. Navigate to Content and from there to the file of interest.
  2. Select the file.
  3. Click the ‘Move Item’ icon (an arrow with an elbow).
  4. In the resulting selection panel find and select the destination folder.
  5. Click ‘Move Here’ to complete the process.

Folders can be moved in the same way.

Finding Content

When working with content you can use the filters panel to search for your assets.  If the panel is not shown, click the ‘Toggle Filter’ icon near the top left.

Note that there is an ‘Include subfolders’ option in the filters section.  If your search finds less than you expect, make sure you have this option enabled.

Tagging Assets

The tags feature allows you to classify your assets, regardless of which folder they live in.  For example, you might want to tag all your 4K videos, or all your portrait signs.

To add a tag to an asset, click the pencil icon to edit, then add one or more tags to the ‘Tags’ field.  You can add multiple tags by separating them with commas, or add tags one at a time by clicking the ‘Add’ button after each one.

To find assets by tag you will see a ‘tag cloud’ appear in the filters panel.  Click on a tag to apply the filter.

Uploading Assets

When uploading images and videos into your folder structure, there are two basic approaches.  You can navigate into the folder where you want the uploaded asset to live, then upload the asset file.

Alternatively, you can upload the asset first (into the top level in your folder structure), and move it into the desired folder later.  The instructions below assume the second approach:

  1. Navigate to Content.
  2. To upload your image or video file you can either (i) click the ‘Upload Assets’ icon (an upwards-pointing arrow) and navigate to your file, or (ii) drag the file from your file browser window into the Director page.
  3. A progress bar will appear.
  4. On completion you can view the asset or move it into a different folder as described above.