HOW DO I USE CAMPAIGNS TO CONTROL WHAT SIGNS ARE SHOWN WHERE AND WHEN

What are Campaigns?

A ‘campaign’ defines which content is assigned to play on each device or screen.

By default, there is a single campaign called ‘My Campaign’.  In many scenarios, using a single campaign is ideal. Content changes are handled simply by changing the assignments within that one campaign and re-deploying.

However, if you have lots of devices, and seasonal content that needs to change on specific dates, you can achieve this by adding multiple campaigns within the campaign schedule.

The sections below describe how to manage and deploy your campaigns:

Preparing Content Assignments in a Campaign

This section describes how to populate a campaign by assigning content to devices.

  1. Log into SignStix Director.
  2. In the main menu on the left, click on ‘Assignments’.
  3. This will automatically open the assignments of the currently active campaign (which may be ‘My Campaign’ or whichever campaign is current according to the campaign schedule).
  4. You will see a list of locations and/or devices:

For a device, the Content column will show the sign (or sequence etc.) assigned to that device.  For a location, the Populated column will show how many devices within that location have an assignment compared to the total number of devices in that location.

E.g. ‘6/10’ indicates that there are 10 devices within that location, and 6 of them have already been assigned some content.

You can double-click on a location to push inside and inspect the devices (or other locations) within it.  Or you can use the filters panel to search for particular sets of devices.

Note that you can assign content either to locations or devices (or a mixture of both).  When assigning to a location, this has the effect of assigning to all the devices within that location.

  1. Select the device(s) or location(s) that you want to assign some content to.
  2. Click the plus (+) button near the top and choose ‘Assign Sign’.
  3. In the resulting selector, find the sign of interest, select it and click ‘Assign’.
  4. This takes you back to the Assignments page, with the ‘Content’ column updated to show your new assignment.
  5. Some types of content (e.g. signs containing a video box) are intended to be deployed along with a video playlist.  To assign a playlist, click the plus (+) button again but this time choose ‘Assign Playlist’.  Once you’ve made the assignment, the page will update to show your chosen playlist in the ‘Video Source’ column.
  6. Repeat this process for each device or location until all the devices have content assigned.

Notes:

(i) Use the ‘Populated’ numbers on locations to identify locations with devices that don’t yet have content assigned.

(ii) When searching, tick the ‘Include subfolders’ filter if you want the search to probe down through all the locations.

(iii) If you move a device from one location to another (in Director), this does not change the device’s  content assignments.  So to give a relocated device the same content as its new neighbours, you would need to assign the relevant content to that device and re-deploy.

Creating New Campaigns

A new, empty campaign can be added by going to ‘Content’ in the navigation menu, pressing the plus (+) button near the top, and choosing ‘Add Campaign’.

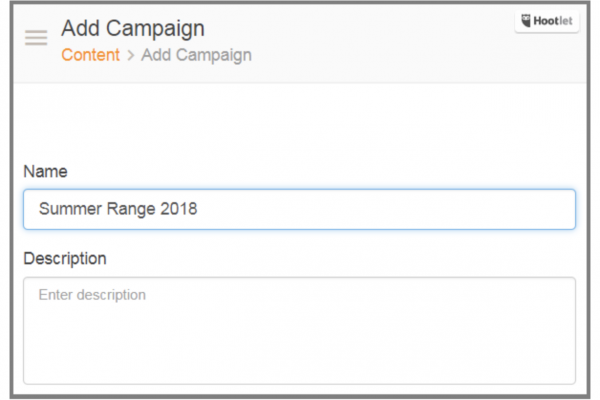
How do I use campaigns to control what signs are shown where and when in SignStix

However, it is generally easier to create a new campaign by duplicating an existing campaign and altering its assignments where required, rather than starting from scratch with an empty campaign.  A duplicate campaign can be created as follows:

  1. Log into SignStix Director.
  2. Navigate to Content > All Campaigns.
  3. Find the campaign that you want to duplicate.
  4. Click the pencil icon to edit that campaign.
  5. Click the ‘Duplicate Campaign’ icon near the top.
  6. Enter a name for the new campaign.
  7. Press the ‘Duplicate Campaign’ button.

To alter the assignments of your new campaign, there are two options:

1. Navigate to the campaign, edit it and click the ‘View Assignments’ icon near the top.
2. (Perhaps easier)  Click ‘Assignments’ in the navigation menu, then click the loudhailer ‘Change Campaign’ icon near the top and select your campaign.

Modify Campaign Settings

Campaign settings, such as its name and the description can be edited as follows:

  • Log into SignStix Director.
  • Navigate to Content > All Campaigns.
  • Locate your campaign.
  • Click the pencil icon to edit the campaign.

Deployment and the Campaign Schedule

Once you have prepared your content assignments, you need to ‘deploy’ that content to the signage devices so they can start playing it.

To do this, press ‘Deploy’ near the top left of the SignStix Director screen and proceed through the confirmation.

Note that the entire campaign schedule gets deployed to the devices, not just the currently active campaign.  This allows a device to start playing a new campaign on a particular date even if the device is offline at the time.

If you are only using the single default campaign (‘My Campaign’), it will be present in the campaign schedule already, so you don’t need to consider the schedule at all.

If you have multiple campaigns, you need to decide when you want them to be triggered, and then set the campaign schedule accordingly (see below).

There may be some devices which do not have a content assignment in every campaign. Those devices will take their content from the most recent campaign in the schedule which does have a content assignment for that device. If there is no such campaign then the devices will show the message ‘No Campaign’.

To avoid any doubt about what will be played, it is advisable to ensure that all campaigns include content assignments for all devices.

Editing the Campaign Schedule

By default, the initial campaign (‘My Campaign’) is already present in the schedule.  Further campaigns can be added to the schedule as follows:

  1. Log into SignStix Director.
  2. Navigate to Assignments > Campaign Schedule.
  3. This shows all the campaigns listed in their scheduled order.
  4. To add a campaign to the schedule, click the plus (+) button near the top right.  In the resulting selector window, choose your campaign, then click ‘Close’.
  5. This will add a new entry at the bottom of the schedule.  You can customise the Start Date and Start Time as per your requirements.
  6. Click ‘Update Campaign Schedule’ to apply your changes.

Remember that you must now ‘Deploy’ (see above) before your campaign schedule will take effect with the signage devices.